The shape builder tool is an excellent way for beginners to learn how to create complex shapes within Adobe Illustrator. This is the tool I use almost everyday in my design projects.
You don’t need to draw all of the curves to make custom shapes in Adobe Illustrator. Sometimes, the easiest way to build a new shape is to combine a few basic ones you’ve drawn already and remove the parts you do not need.
Mastering the Shape Builder Tool is a good foundation for creating any kind of custom shape. This is the tool top designers are using to create brand visual elements.
Basically, the tool lets you merge overlapping shapes, remove unwanted sections and turn simple geometric objects into custom vector artwork. Knowing how it is used means you can use it to make logos, icons, illustrations and other graphics with more control.
This tutorial will teach you some basics of the Shape Builder tool in Adobe Illustrator, how to use it to combine shapes, how to subtract parts of shapes and some common beginner mistakes.
What Is the Shape Builder Tool in Adobe Illustrator?
Shape Builder Tool is a feature in Illustrator that allows to merge or delete overlapping shapes and paths. One of the big advantages of this is that you can edit anchor points without having to go through several commands, you can edit the portion of your artwork that you want to keep or delete.
Suppose you would like to make a basic cloud icon. You might draw several overlapping circles, then merge the circles you see, and use them as one custom shape. Selected areas can also be deleted for cut-outs or to trim the borders.
It’s a handy tool for creating logos, flat drawings, symbols, badges and geometric graphics.
Adobe explains its core functions in the official Shape Builder Tool guide.
Step 1: Create the Shapes You Want to Combine
To use the Shape Builder Tool, you must have two or more shapes or paths overlapping.
Open the file Adobe Illustrator and make a new document. Click the Rectangle Tool in the toolbar, and then draw a rectangle on the artboard.
Next, use the Ellipse Tool to draw a circle that crosses one side of the rectangle. Now you should see two shapes, with a visible intersection.
Their fill color can be changed to make it easier to see their overlap. For this exercise, use two different colors and leave the stroke settings simple.
The objective is to establish a small, clear example that you are able to observe the functionality of the tool in terms of overlapping areas.
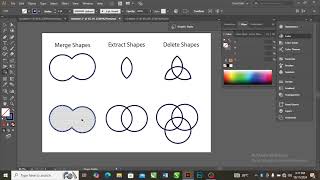
Step 2: Select the Shapes
The Shape Builder Tool is applied to shapes that are selected.
Select the Selection Tool (press V on your keyboard). Click and drag a selection box around both shapes, or click the first shape and hold down the Shift key while clicking the second.
Now both objects should be highlighted.
This is important because the selected paths help to identify which areas can be merged or removed in Illustrator. Only use one object, otherwise you might not achieve the desired effect.
To keep the workflow cleaner, only select the objects that are a part of the design that you are creating.
Step 3: Activate the Shape Builder Tool
With both shapes selected, activate the Shape Builder Tool.
You can find it in the Illustrator toolbar, or press Shift + M on your keyboard.
Hover over the overlapping shapes. As you hover over each region, the illustrator highlights that same region. Highlighted areas indicate where you can merge and modify.
Imagine the artwork as a series of smaller pieces, formed by the crossing of the paths. The Shape Builder Tool allows you to determine which parts of the shape will be included in your design.
If no shapes highlight, go back to the Selection Tool and ensure that the correct shapes are selected.
Step 4: Combine Shapes into One
Let’s now make another shape, using the rectangle and the circle.
While the Shape Builder Tool is active, hover over one area of the artwork. Click and drag across the adjacent areas to be joined, and then release the mouse button.
Illustrator merges or combines the selected regions into a new shape.
If you drag across the rectangle and the circle, for instance, it may turn into one single outline instead of two overlapping objects.
This is useful when creating a custom silhouette from simple shapes. The combination of just circles and rectangles can make a cloud, a speech bubble or part of a logo.
Important tip:: drag across the whole area you wish to include in the final shape. If omitted, it may be left out.
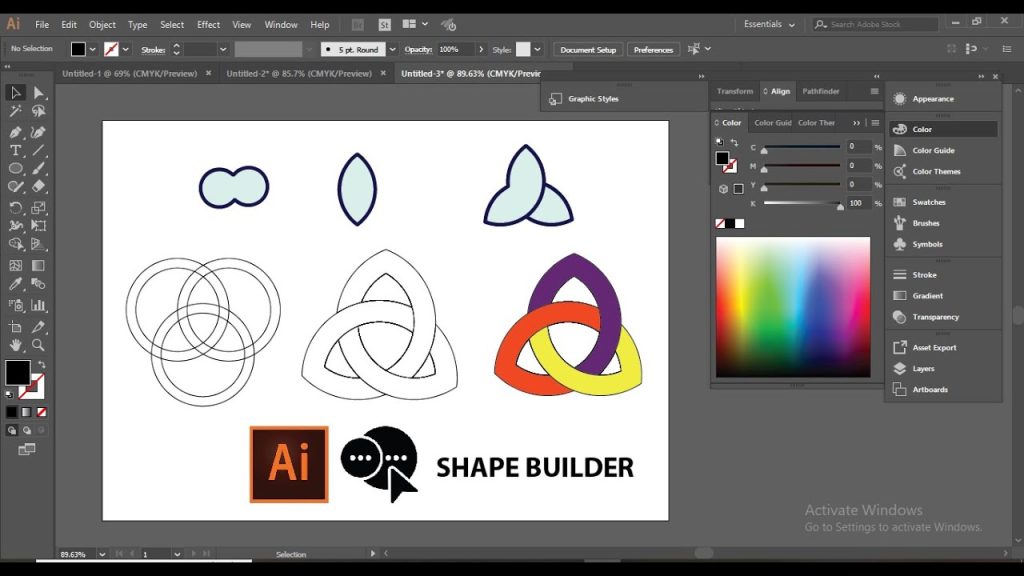
Step 5: Remove Unwanted Parts of a Shape
Combining shapes is only half of what makes this tool useful. You can also subtract unwanted regions.
For instance you want to create a crescent-like cut-out from a circle. Draw a large circle and place a smaller circle over it so that the two overlap.
Use the Selection Tool to select both circles and then use the Shape Builder Tool.
On Windows, press and hold down the key Alt. On macOS, press and hold the Option key. While the modifier key is held down, your cursor goes into the removal mode.
Click or drag over the area to remove, and release the mouse button.
Illustrator clears the selected area out of the selected art. It will depend on the shape that is cut out and how the shapes overlap.
This technique is useful for making cut-outs, trimming silhouettes and removing unwanted sections from geometric designs.
To undo the previous action press Ctrl + Z (Windows) or Command + Z (macOS) if you make a mistake.
Now Combine Techniques to Create a Mini Project
Practice this simple exercise: design a simple location-pin symbol consisting of a circle and a triangle.
Using the Ellipse Tool, draw a circle. Next, using the Polygon Tool, draw a triangle. Adjust the number of sides to 3 in the Polygon options. Position the triangle so that its upper section overlaps the bottom of the circle.
Click on both shapes and hold down the Shift key as you click and hold the mouse button to activate the Shape Builder Tool (Shift + M).
Drag over the areas that create the outer bounds of the location pin. The shape should create one continuous shape.
If there’s a part of the result you don’t want, undo it and move the shapes again until you get it.
Then fill in with a color and delete the stroke (if desired) to create a nice flat little icon.
For a traditional map-pin appearance, you may need to refine the triangle’s width and position or use additional shapes. The important thing here is that you can build the basic structure from simple objects rather than drawing the entire outline freehand.
Step 7: Make Color Corrections and Tidy Up Your Drawings
Once merged or deleted regions, check the merged or deleted area before proceeding.
Click on the shape to select it and use the Fill and Stroke controls to customize the shape’s look. The stacking order of objects can also be changed, elements can be aligned, and the Direct Selection Tool can be used to edit a single anchor point, if needed.
Please be aware that the fill color produced may vary depending on the drawing and the order in which you begin or finish a merge operation. When the colors are combined with different colored shapes, look at the outcome and add the desired color.
If it is an independent section, make sure you have a Selection Tool selected to see if it is independent from the rest. It may need to be merged again or the selection changed.
When the artwork appears correct, save the Illustrator file as an ‘Illustrator file’ to be able to edit it later. For other uses, export the artwork in appropriate format, depending on your project such as SVG or PNG.
Common Shape Builder Tool Problems and How to Fix Them
The Shape Builder Tool is not working: Be sure to have the correct shapes already chosen before pressing Shift + M. Be sure that you have appropriate paths, rather than an object that requires extra preparation.
The wrong region disappears: If you have to undo the action, zoom in and hover over the artwork to see what the highlighted area is, before you remove it. At low zoom levels it can be hard to see small intersections.
The merged shape has the wrong color. Click on the result and use the paint color of your choice for the fill. The behavior of the Illustrator may influence the appearance that is retained.
The shapes are not overlapping: Position the objects so that their paths cross or so that they can be positioned to form the regions desired. If there weren’t intersections to merge and subtract, there would be nothing useful to do.
The artwork is difficult to handle: Use only objects necessary for each operation. If you have a lot of shapes on top of each other in your illustration, work it out in small sections rather than picking out each object.
Shape Builder Tool vs. Pathfinder: Which one to use?
Shape Builder and Pathfinder can merge or subtract shapes; but they have different workflows.
The Shape Builder Tool is an interactive tool. You can select specific sections of the drawing, drag over the parts you wish to merge and delete parts of the image directly on the drawing. It is very useful for learning how to draw custom shapes graphically.
Pathfinder offers commands for tasks like Unite, Minus Front, Intersect and Exclude. It is useful if you want to perform a certain Boolean operation on selected objects.
Both tools have their advantages and disadvantages. When editing individual regions, it’s sometimes easier to use Shape Builder. If a geometric operation is to be repeated, Pathfinder might be more appropriate.
Practise Until Combining Shapes Feels Natural
The easiest way to master the Shape Builder Tool is to use it with easy-to-draw shapes before using it for artwork.
Use two overlapping circles. Combine and undo them, then delete one of the overlapping areas. Do the activity again with rectangles, triangles and other more complicated shapes.
You’ll start to notice as you practice how overlapping paths break up artwork into “editable regions. With that knowledge, it’s easier to create custom logos, icons, illustrations and other design projects.
These skills will provide you with a solid foundation in more advanced vector design skills.